What is Bikepacking? A 5-Step Guide for Your Next Bike Adventure
Whether you spotted your bike and thought, “How far can I go with this thing?” or someone invited you to go for a ride and not return on the same day (insane, I know), you’ve come to the right place.
I am Fernando Cintra, a seasoned bikepacker, cycling writer, and author. In this article, I will highlight what bikepacking beginners need to know to transform their vicinity into a full-blown exploration in 5 comprehensive steps.
Here is what we will cover:
- What is bikepacking;
- Bikepacking routes;
- Types of bikepacking bikes;
- Bikepacking bags and packs;
- Gear, clothes, and sleeping arrangements.
By the end of the article, you can plan a bikepacking trip, choose a bike fitted for the job, learn what to pack, and have a much better understanding of bikepacking essentials.
1- In short, what is bikepacking?
Bikepacking is the act of traveling by bike lightly packed, generally with bags strapped to the bicycle, with most of the route being on dirt roads and trails. Those who go bikepacking also tend to choose camping over staying at hotels, although this isn’t a norm, as wild camping regulations change a lot by country and region.
Due to its off-road nature, most bikepacking trips are made in mountain bikes or gravel bikes that can sustain multi-day beating.
What is the difference between bikepacking and bike touring?
Bike touring refers to traveling by bicycle, mostly on paved routes, with chunkier pannier bags carrying bulky items and potentially staying in hotels. Its bikepacking counterpart is done mostly off-road; riders pack light.
At some point, “bike touring” was used as a broad and generic term that involved any type of cycle touring. Nowadays, it is broadly accepted to say that modern bikepacking and cycle touring are different categories of traveling by bike altogether.
In other words, you probably would never call people bikepacking “cycle tourists.”
Is bikepacking a sport?
Bikepacking isn’t a sport per se, but there is a spot in which sport and bikepacking converge; these are self-supported endurance races.
In such events, riders prepare a backpacking setup, pack light, and set out for a multi-day or even multi-week races where they carry everything they will need on the way – apart from food and water. Two examples of self-supported bikepacking endurance races are the Tour Divide and the Silk Road Mountain Race.
2- Bikepacking routes
The route is the first thing you will need to plan for a bikepacking trip. A route will cascade onto all the other planning you will do, such as picking your gear, bike, and more.
In this section, we will discuss the types of bikepacking routes you can take and then how to find and plan them.
Types of bikepacking routes
As I stated earlier, bikepacking is the dirt-craving, outcast-riding cousin of cycle touring. Typically, a bikepacking trip will happen on the following terrain:
- Gravel Roads;
- Trails and single tracks;
- A mix of asphalt, gravel, and single tracks.
I will go over what type of bike you should employ for each of these terrains later on.
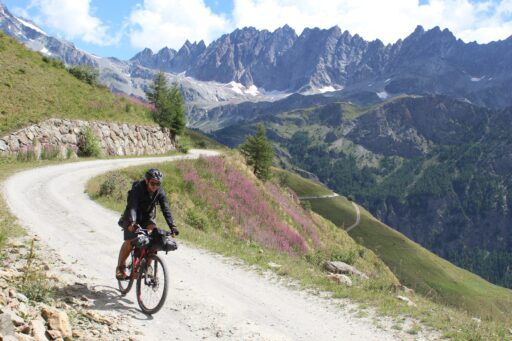
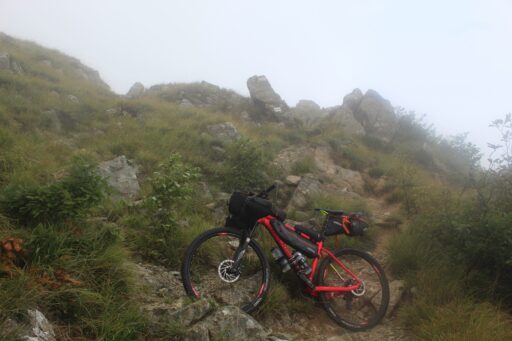
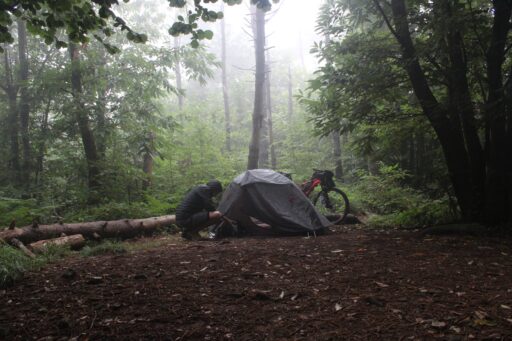
Sometimes, during bikepacking, you will do some hike-a-bike, essentially pushing or carrying your bike up or down narrow trails on unrideable sections, like so:
Bikepacking routes can take the rider on multi-week adventures to just a weekend out. Going out on one day, camping, and returning the next one are commonly referred to as “local overnighters” or just “overnighters.”
Moving on, there are three ways you can go about planning a route:
- Planning it yourself with apps;
- Searching it on good websites;
Best bikepacking route planning apps
Long gone are the days when cyclists relied upon physical maps and asked around to find their way. Technology is a double-edged sword; it did severe human contact in some ways but also enabled bikepackers to go to unheard and secluded places.
Bikepacking apps will go a long way in helping you plan a route but also follow an existing one. These are my top 3 recommendations for bikepacking apps:
Komoot
Komoot became my go-to bikepacking app back in 2019 when planning for Alta Via dei Monti Liguri, a 14-day long trip deep into Ligurian forests and hills.
Komoot has a very intuitive and user-friendly interface. It is super easy to plan routes, upload GPX files, divide longer routes into multi-day rides, and more. It is also super simple to organize your bikepacking routes in the library, share your rides with friends, and more.
They have a comprehensive free version, but the premium is very much worth the money. Komoot has some other cool features, which I will share in the next section.
Wikiloc
Wikiloc is my plan B app, and I mainly use it when I am in Brazil, as Komoot isn’t so popular there. Wikiloc is also much cheaper, and their free version is more complete.
Strava
Yes, Strava for bikepacking. Some five years ago, I would have never advised the most popular cycling tracking app in the world for route mapping. But things changed a lot over time.
Strava route creation feature allows bikepackers to plot the local heatmap on top of the roads and trails. This is a fantastic “validation” tool, so to speak; the strongest the color, the greater the chances a particular path is reliable for bikepacking.
I use Strava in combination with Komoot; even though some of their features overlap, each of them offers unique functionalities. Besides, neither eats much of my phone’s battery.
Best websites to search for bikepacking routes
“Where can I just get some routes, download and follow on my device?” I hear you; chances are you will not want to be fussing around maps plotting your own course.
These are some great places to get started in the search for routes:
Bikepacking.com
Bikepacking.com has the most comprehensive library of bikepacking routes in the world. There is just about something for everyone there, all of which come with a plethora of tips, photos, GPX files, and more.
Besides, the comment section is always rich with additional advice from cyclists that experienced that same trip.
Komoot (again)
Komoot also has a very interesting library of routes. They don’t offer the same amount of information in such a comprehensive manner as Bikepacking does. Also, sometimes I have the impression their library isn’t really well curated – some of the routes seem to show up in their rankings as if it was just tossed there by an algorithm.
However, since the routes are created by their users, chances are you can get good insights into places to ride in less popular destinations (Bikepacking.com is heavily Euro and North American-centric.)
Cintra.cc
This very site you are at right now also has a section dedicated to bikepacking and mountain biking routes. Be sure to check it out before heading off-road.
3- Types of bikepacking bikes
Fantastic! We now know where we will get dirt, eat cold noodles and breathe fresh air. Now we move to the second part of the article; choosing your rig.
I promise this is the last time I will say this: bikepacking is done mostly off-road, and the best bike is the one that reflects the terrain in which you are riding.
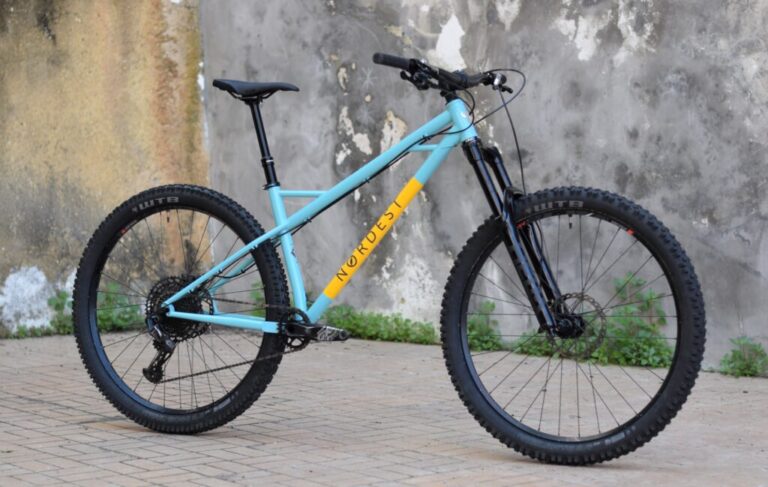
Mountain bike
Do you ride to go do groceries? Buy a mountain bike.
Do you love being in nature and shredding trails? Get a mountain bike.
Perhaps you want to go on a multi-day adventure that would change your life? You guessed it; mountain bikes.
A mountain bike is the most popular choice of bike, with good reason. It can reliably let you face remote backcountry trails, long stretches of asphalt, and anything in between.
However, dropping by your local bike shop and asking for a mountain bike isn’t the wisest way to go about it. Check this article if you want to learn more about mountain bikes as a beginner; that will surely help you pick the right type of mountain bike for your bikepacking trip.
Gravel bike
Due to its relaxed geometry for long distances, comfortable handling, and tires wide enough to face most dirt roads, Gravel Bikes are the next obvious choice for bikepacking.
Even though they are not as capable as their mountain counterpart, gravel bikes are fantastic when bikepacking a mix of fire roads, smooth singletracks, and pavement. If you don’t plan on bikepacking very challenging trails and terrain, they are great bikes.
I have a full article on the site dedicated to helping you learn what gravel bikes are.
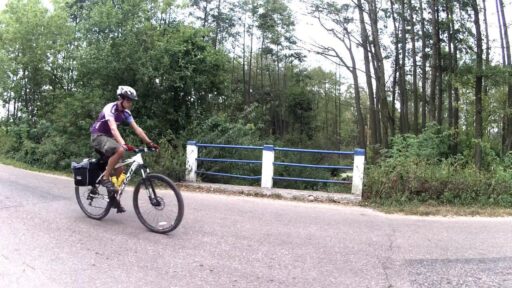
Trekking, city, and road bike
This category encompasses all bikes that are not built for off-road situations but could potentially manage one outing or two, given they don’t demand so much of your bike.
You can definitely go bikepacking with an endurance road bike or with one you use to cycle to work. Bear in mind these aren’t built with the Tour Divide, so they can serve as an initial “step into the water” sort of trip to see if bikepacking is your thing or not.
Bike frame material
Choosing the right frame material is also key when picking your bikepacking rig. Bike frames are built essentially from 4 materials, and this is how each can impact your next adventure:
Carbon
Much lighter and stiffer than all the other materials, carbon frames usually don’t make it to the top of the list when picking a bikepacking bike. The reason is simple: carbon hate to be rubbed by bikepacking bags… and anything else, essentially. That can significantly damage your frame and potentially put you in danger.
This is not to say you can’t go bikepacking if you do have a carbon bike. Just always use the appropriate protections to avoid damaging the frame.
Aluminum
Aluminum is resistant to corrosion, inexpensive, and tolerates bikepacking bags enough so you can strap them around your bike worry-free. Aluminum frames are also fairly light.
The downside is that aluminum is tricky to repair, and generally, visible damage on the frame probably means it is condemned and should be discarded.
To be fair, I have bikepacking with aluminum bikes for over 20 years, and never have I had any sort of problem with it.
Steel;
Steel was the go-to bike frame material once upon a time. With new technologies that made aluminum much cheaper and easier to assemble, steel frames’ top spot was lost.
That is not to say steel bikes aren’t good for bikepacking, though – on the contrary: Steel frames are among the easiest to repair and are quite resistant to impacts and bags rubbing against them.
Moreover, steel is a stronger material in comparison to aluminum, and thus steel frames can be built with thinner tubes, allowing for a bike that absorbs impacts quite well.
Titanium.
Titanium has got to be the crème de la crème of bike frame material for bikepacking. It is extremely resistant and has the best strength-to-weight ratio, and repairing it is relatively easy. Titanium shares some qualities with steel, but it’s lighter and corrosion bullet-proof.
Titanium bikes are generally the go-to choice for custom frame builders. So if you are thinking of taking the whole bikepacking thing seriously, consider having a titanium frame custom build for you. It is sure to last a lifetime.
4- Understanding bikepacking bags and packs
We are halfway through: you have a route and pick your bike. Next in line are bikepacking bags and packs. I divided this section into two: brands and types of bags.
Best bikepacking bags brands
Before we dive into the types of bags, let’s understand brands. With bikepacking’s skyrocketing popularity over the past few years, there is an abundance of good bag suppliers to pick from.
Here are five of the many you can pick from:
In this article, I won’t invest much into explaining the pros and cons of each of these brands (that will be left for a future post). Just rest assured if you buy any of these brands, chances are you will have a great product in your hands.
Types of bikepacking bags
Below you will find the most popular types of bikepacking bags. There are some specific packs and bags that you can strap or attach to different parts of the bike, but as a beginners’ guide to bikepacking, I will focus on the essentials:
1- Handlebar bags
Handlebar bags, as you might have guessed, mounts at your handlebar. The first thing you must pay attention to is whether you have a drop bar or a flat bar on your bike.
Drop bar-specific bags are narrower and can fit less gear, whereas flat bar bags are wider and can fit more stuff:
Additionally, there are three types of handlebar bags you can pick from; a handlebar roll, a top-loader, and a harness.
A roll is a handlebar bag with an opening on the sides, and the straps are integrated with the bag. Rolls resist water pretty well and allow you to distribute the weight horizontally. On the downside, every time you need to get your things from it, you need to unload them from your bike.
A top-loader opens (you guessed it) from the top. It is much easier to access your gear, but it has trouble dealing with water, and you will need quite a good amount of vertical space for it not to touch your tire – you might need a rack under it to sustain the weight.
Finally, a harness is like the roll, but the shell that sustains the load is separate from the bag itself. These are much easier to load and unload than the roll while still allowing for a good horizontal distribution. On the flip side, you will need to ensure the bag is firmly attached to the harness, as it can slip sideways.
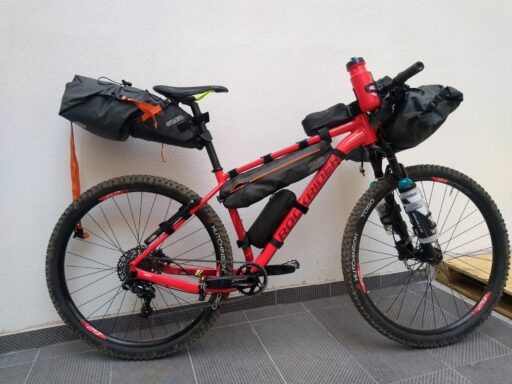
2- Frame bags
Frame bags are a fantastic option for carrying heavier items, as the frame can more firmly support the load. Needless to say, there are also plenty of types of bikepacking frame bags, but I will focus on the three main points here.
A bikepacking frame bag can (1) attach to your top tube, (2) occupy the full-frame area and (3) be custom-made.
Frame bags that only attach to the top tube are smaller and, if your frame is big enough, still allow you to install bottle cages under it.
Full-frame bags, allow you to carry much more load and stay more firmly in place, but you will need to find different places in your bike to carry water bottles.
One issue that both types have, however, is that frame shapes vary drastically from one bike brand to another. That is where custom frame bags come in place. This is particularly useful for full-suspension mountain bikes, like so:
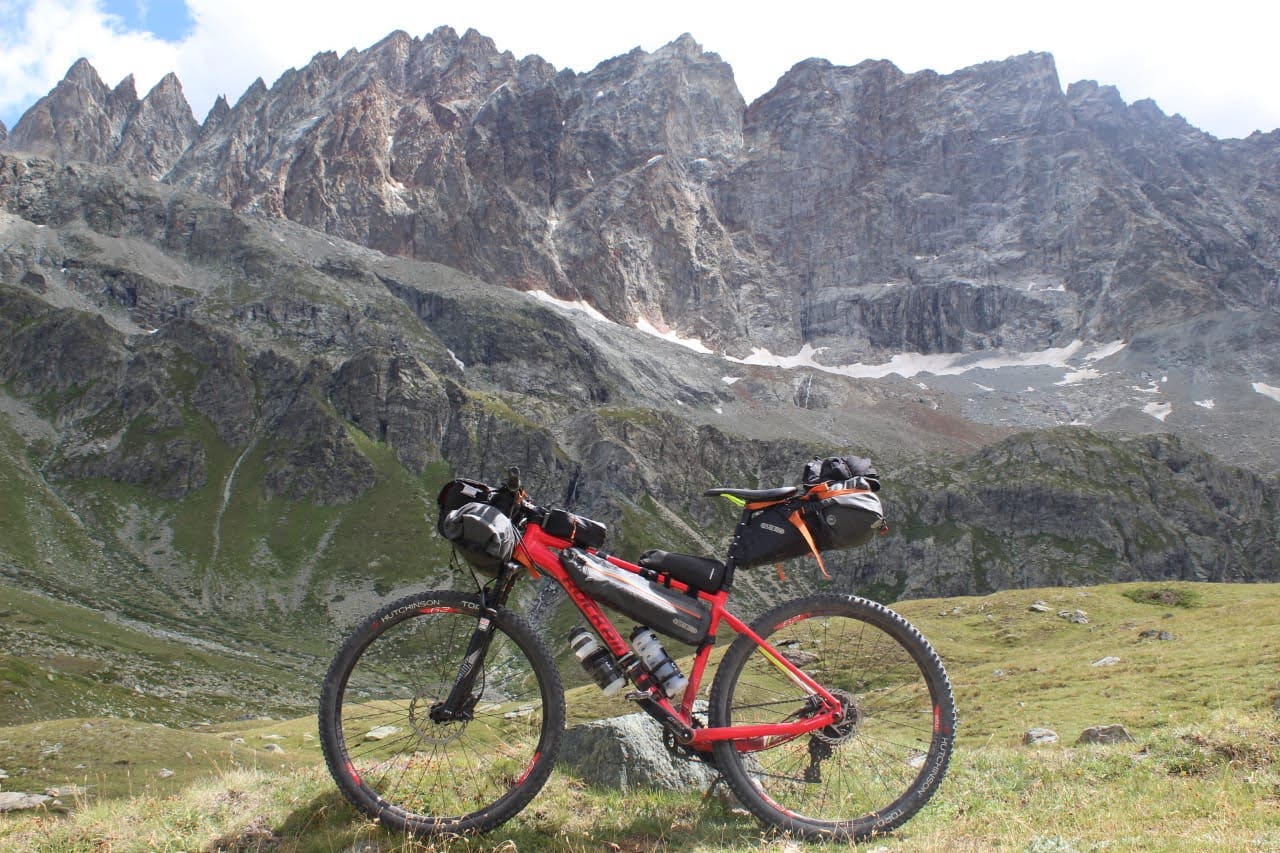
3- Saddlebags and seat packs
The first time bikepacking caught my attention was when I saw this dude with a long tail coming out of his seat post. I was in awe and in “ew” at the same time. Little did I know that would be my favorite type of bikepacking bag later in life.
Saddle bags and seat packs strap around your seat post and saddle area. Nothing much to add here.
5- Bikepacking gear and clothes
With a route, a bike, and bags in place, it’s time to talk gear. I divided this topic into two: gear list and how to pack. Let’s get to it:
Bikepacking gear list
Bikepacking is done lightly, and I’ve always taken minimalism to a fault when packing for my trips. This is why the following should be taken as an “essentials” list. Moreover, I am going to assume you want to go bikepacking when the weather is at least moderately warm outside, and you will not cross 15k feet passes in the Himalayas all the time.
Build on top of these recommendations and see what works best for your trip.
Bikepacking clothes
I grouped on and off-the-bike items in the same list. Keep it in mind as there will be some things you will not be wearing all the time (and you will need space for them in your bags).
- Helmet;
- 1 pair of gloves;
- 2 shirts or jerseys with UV protection;
- 2 casual shirts for off-wear use and sleeping;
- 1 cycling shorts with padding;
- 1 waterproof zip-off shorts – I generally wear them on top of the cycling shorts.
- 1 pair of arm warmers;
- 1 long-sleeve windbreaker;
- 1 waterproof jacket;
- 3 pairs of socks;
- 3 underwear;
- 1 pair of flip-flops;
- 1 warm fleece or jacket;
- 1 pair of sunglasses.
Electronics and navigation
I’ve already done my fair share of bikepacking trips in Europe and South America, but still, I’ve been told my electronics and navigation setup is jarringly small. Still, this is what I carry:
- A phone;
- Quadlock mount;
- One power bank;
- One headlamp (essential for wild camping);
- Two flashlights (a front light and a rear light);
- A camera.
- Earbuds.
- Charger;
Yep, I’ve never ever used a dedicated navigation device. I just despise having another thing on my bike cockpit – admittedly, maybe I just never really needed one in the places I’ve been to (even though that includes remote areas of Brazil, far away mountain ranges in Romania, and deserts in Chile, but still…)
If you already have one, by all means, take it with you. If you still don’t, and you weigh whether that new Wahoo is worth 200 bucks or not, I strongly advise you to try hitting the road at least once without a GPS.
Personal hygiene and first aid
To stay clean and safe, this is what I take:
- Dental hygiene stuff;
- Toiletries;
- Shower gel and shampoo;
- A disinfecting solution;
- Hand wipes;
- SPF50 sunscreen lotion;
- A first aid kit.
I strongly advise against soap and shampoo in bars. They will make your bag a mess at some point. I also recommend you take biodegradable toothpaste and shower products – chances are you will be using rivers, springs, and fountains as your tap from time to time.
Sleep system
Bikepacking and camping go hand in hand. Before listing the sleeping gear you should take, this is what you need to know:
- Weight: make sure everything is as light as possible;
- Temperature: picking a good sleep system adequate for the weather you will face is key for staying warm and safe – but also dry and not too hot.
- Terrain: some routes cover very uneven terrain where it can be hard to mount some types of tents. Assess the terrain of your trip before buying a tent.
Now for the camping gear list:
- A lightweight tent or bivvy bag;
- A sleeping bag with adequate temperature;
- An inflatable sleeping pad;
- An inflatable pillow;
Bikepacking camping gear is a universe in itself. A sleeping bag requires special attention, as material, temperature, and volume vary a lot from model to model. For now, I will leave it at that, but I will come back here and link to a future article on bikepacking and camping once it’s written.
Cooking and water
When I heard of cold-soaking and stoveless camping, I immediately fell for it. As a hardcore minimalist both in bikepacking and in life, my eyes roll everything I see people traveling with a stove.
Just think about it: it’s a flipping stove! I don’t take my fridge, toilet, bed, TV, or vacuuming robot with me; why would I take a stove and gas? There are plenty of options for bikepacking meals that involve just mixing them with water. Besides, nuts, dried fruits and vegetables, hard cheeses, and supplements are all nutritious and don’t require any cooking.
After I set myself free from cooking and dish-washing in the middle of a forest, my “cooking” gear looks like this:
- An aluminum mug;
- A camping fork, knife, and spoon;
- Three 750ml (25 oz) bottles on hotter days, two in cooler ones;
- Portable water filter;
- Water purification tablets.
Tools and miscellaneous
And lastly, all the rest: the little things you need to take when bikepacking, AKA miscellaneous and tools. Remember to adapt the list to your circumstances:
- Multitool bike kit with chain tool;
- Drivetrain mini maintenance kit (a rag and chain lube)
- Puncture repair kit;
- Zip ties;
- Plastic bags (for trash) and Zip-lock bags (for hygiene stuff);
- Spare lights;
How to pack
When it comes to packing your bikepacking gear into your bags, it all comes down to weight distribution. The following is a piece of general advice and should just give you an idea of what to place where.
- Food and electronics go in my frame bag.
- Camping gear is placed in the handlebar bag.
- Clothes and hygiene stay in the seat pack.
Pro tip: place the heaviest of your clothes in the bottom of your seat pack. This way, you prevent the bag from swinging around.
The single best tip for your first bikepacking trip
I hope you enjoyed reading this article as much as I did writing it. If I were to wrap it up with the single best tip for bikepacking beginners, it would have to be: do a test ride.
Pack your entire pack as you would and ride it around on terrain at least somewhat related to the one you will face on your trip. Things to ask yourself during your test ride:
- Are any of the bags touching the wheels?
- Is the seat bag swinging?
- Are things jumping around in the frame bag?
- How much do I need to increase my tire and suspension air pressure to cope with the extra weight?
The aim of this article was to help you get started with bikepacking, but remember that, in the end, a lot will come down to your personal preference and experience. Cycling is fantastic, and bikepacking is even more so. Happy trails ahead!